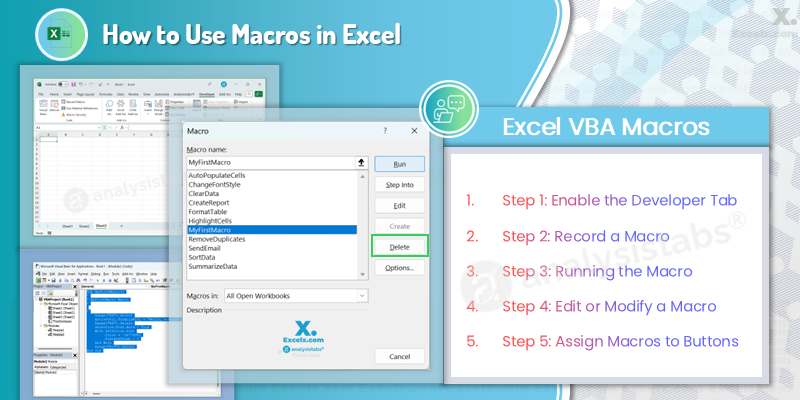
Macros in Excel are one of the most powerful tools available to automate repetitive tasks, streamline workflows, and boost productivity. Whether you’re working with large datasets or just need to repeat the same formatting actions across different worksheets, macros can help you save valuable time and effort. In this guide, we will walk you through the steps of how to use macros in Excel, from recording simple macros to running and managing them effectively.
What Are Macros in Excel?
A macro in Excel is a sequence of commands that you can record or write in VBA (Visual Basic for Applications) to automate tasks. These tasks can range from simple formatting changes to more complex operations such as data manipulation, calculations, or generating reports.
Why should you use macros?
- Save time: Automate repetitive tasks, reducing manual work.
- Consistency: Ensure that tasks are performed the same way each time.
- Efficiency: Speed up processes by executing multiple steps with one click.
How to Use Macros in Excel: Step-by-Step Guide
Step 1: Enable the Developer Tab
To use macros, you need to access the Developer Tab in Excel, which is hidden by default. Here’s how to enable it:
- Click on File in the ribbon, then choose Options.
- In the Excel Options window, click Customize Ribbon in the left-hand menu.
- On the right, check the box for Developer.
- Click OK.
The Developer Tab will now appear on the ribbon, providing you with tools for recording, editing, and running macros.
Step 2: Record a Macro
The Macro Recorder is a great tool for beginners. It allows you to record actions in Excel and convert them into a macro without needing to write any VBA code. Here’s how to do it:
- Go to the Developer Tab and click Record Macro.
- In the Record Macro dialog box:
- Name your macro (e.g., “FormatData”).
- Optionally, assign a shortcut key to run the macro.
- Choose where to store the macro (typically in This Workbook).
- Click OK to start recording.
- Perform the actions you want the macro to automate (e.g., formatting cells, creating charts, etc.).
- When done, go back to the Developer Tab and click Stop Recording.
Now, the recorded macro is ready to use. You can run it with the assigned shortcut key or by accessing it from the Macros dialog.
Step 3: Running the Macro
Once you’ve created or recorded a macro, you can run it to perform the automated actions. Here’s how:
- Go to the Developer Tab and click Macros.
- In the Macro dialog box, select the macro you want to run.
- Click Run.
Alternatively, if you assigned a shortcut key when creating the macro, you can simply press the shortcut to execute the macro.
Step 4: Edit or Modify a Macro
If you want to make changes to an existing macro, you can do so by editing the VBA code in the VBA Editor. Here’s how:
- Press Alt + F11 to open the VBA Editor.
- In the Project Explorer, find your workbook and click on Modules.
- Double-click the module that contains the macro you want to edit.
- Modify the VBA code in the editor to suit your needs.
- Press Ctrl + S to save your changes.
This method is ideal if you need more flexibility than the macro recorder offers and want to customize the code further.
Step 5: Assign Macros to Buttons
To make it even easier to run your macros, you can assign them to buttons on the worksheet. Here’s how:
- Go to the Developer Tab and click Insert under the Controls group.
- Choose the Button (Form Control) option.
- Click and drag to draw a button on your worksheet.
- In the Assign Macro dialog box that appears, select the macro you want to assign to the button.
- Click OK.
Now, when you click the button, the assigned macro will run.
Best Practices for Using Macros in Excel
To make the most out of your macros and ensure they’re safe and efficient, here are a few best practices:
1. Name Macros Clearly
When naming your macros, choose descriptive names that reflect the tasks they perform. This makes it easier to identify them later, especially when you have many macros.
2. Use Comments in VBA Code
If you write your own VBA code, use comments to explain what each part of the code does. This will make it easier to maintain and update your macros later.
Sub FormatCells()

' Apply bold font to cells A1 to A10
Range("A1:A10").Font.Bold = True

End Sub
3. Test Macros Before Using Them
Before running macros on important data, test them in a copy of your workbook. This will help you avoid errors that could affect your data.
4. Backup Your Data
Always keep backups of your workbook, especially when working with complex macros that can modify large amounts of data.
- Be Cautious with Macros from External Sources
Macros can contain harmful code, so never enable macros in files from untrusted sources. Always inspect the code if possible before running it.
Conclusion
Using macros in Excel is a powerful way to automate repetitive tasks and streamline your workflow. By recording simple macros, running them with a click, or even writing your own VBA code, you can save time, reduce errors, and enhance productivity. Whether you’re a beginner or experienced user, mastering macros will make you more efficient in Excel.
Start experimenting with Excel macros today and see how automation can improve your tasks and workflow!