A Quick Reminder: Workbook vs. Worksheet
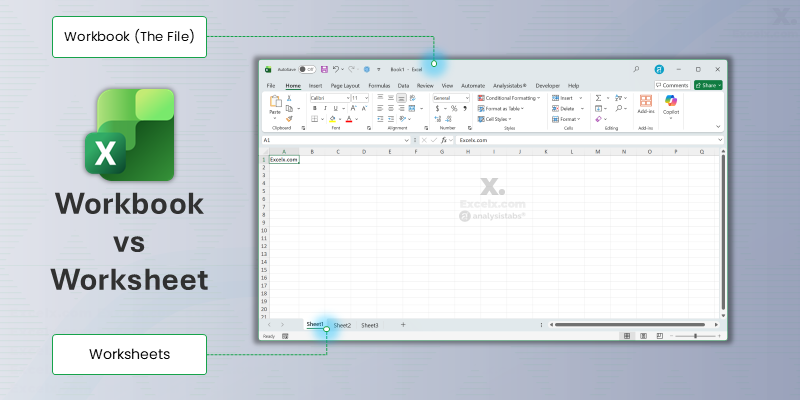
Before we save, let’s quickly review the “Binder and Sheets” analogy from Lesson 1. This is a core concept that’s especially important for file management.
- The Workbook: This is the entire file (the “binder”), like
MyBudget.xlsx. - The Worksheet: This is a single tab or “page” inside the binder (like “January”, “February”, etc.).
In this lesson, we are learning how to create, save, and open the entire Workbook (the binder/file itself).
How to Create a New Workbook
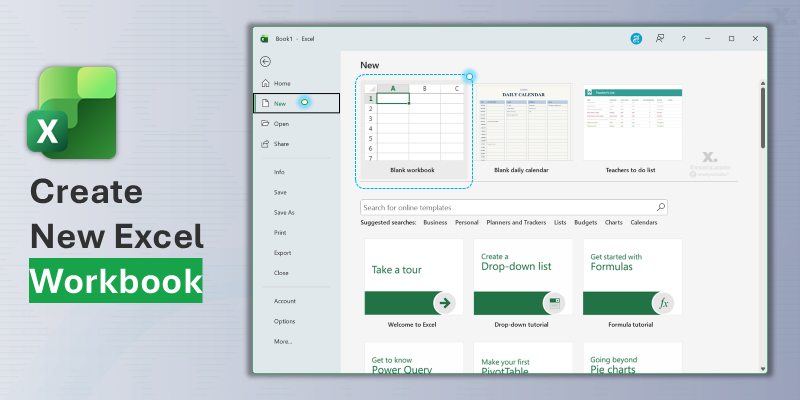
Every time you want to start a new project, you’ll begin by creating a new, blank workbook. When you first open the Excel program, you’re greeted with a “New” screen. If you’re already in a file, you can always get back there.
- Go to the File tab (the very first tab on the top-left).
- Click on New.
- Select “Blank workbook”.
That’s it! A new, empty workbook (a blank “binder”) is opened for you.
Note: You’ll also see many “templates” (like pre-built calendars or budgets). For learning, it’s always best to start with a “Blank workbook” so you can build from scratch.
How to Save Your Work (The Most Important Skill)
This is the most critical part of this lesson, and maybe the most important habit you’ll ever learn in Excel. Nothing is worse than losing your work.
Understanding the difference between “Save” and “Save As” is the key to managing your files like a pro and avoiding headaches.
The Golden Rule: Save vs. Save As
- Save (
Ctrl + S): Think of this as “Update this file.” It saves your changes over the current version. - Save As (
F12): Think of this as “Create a new copy.” It will ask you for a new name or a new location. Use this when you want to create a different version of your file without changing the original.
Your First Save: A Step-by-Step
- Go to File > Save (or just press the keyboard shortcut
Ctrl + S). - Since this is the first time you’re saving this new file, Excel will automatically do a “Save As”.
- Choose a location on your computer (like your “Documents” folder).
- Give your file a descriptive name (e.g., “My-First-Budget” instead of “Book1”).
- Click Save.
Pro Tip: Save Every 5 Minutes!
Press Ctrl + S (or Cmd + S on a Mac) constantly. There is no worse feeling in the world than losing an hour of work because the power flickered or the program crashed. Make saving a reflex!
How to Open an Existing Workbook
Great! You’ve created a file, done some work, and saved it. Now it’s the next day and you want to continue. How do you open your file again?
You have two easy ways, starting from two different places:
- The difference between a Workbook (the file) and a Worksheet (the tab).
- How to create a new, blank workbook.
- The critical difference: “Save” (updates) vs. “Save As” (creates a new copy).
- The life-saving habit of pressing
Ctrl + S. - Why you should almost always save your work as an
.xlsxfile.
A Quick Note on File Types (.xlsx, .xlsm, .csv)
Have you ever saved a file and then re-opened it, only to find all your formulas and formatting are gone? This is a common mistake for beginners, and it’s almost always because the file was saved as the wrong type.
When you save, you’ll see a “Save as type” dropdown. As a beginner, you mostly just need to know about these three to prevent any data loss:
.xlsx(Excel Workbook): This is the standard, modern, default file type. Always use this unless you have a specific reason not to. It stores everything: your data, formulas, charts, formatting, and all your worksheets..xlsm(Excel Macro-Enabled Workbook): This is identical to.xlsx, but it can also store and run macros (automations). If your file doesn’t have macros, you don’t need this. Excel will prompt you if you need to use this..csv(Comma Separated Values): (Warning!) This is a plain text file. It saves only the data from your active worksheet. All formatting, formulas, charts, and your other worksheets (tabs) will be lost forever. It’s used for exporting data to other programs, not for saving your work.
Try It Yourself: Download an Example File
A great way to learn is by exploring a file that’s already built. You can download the complete MyBudget.xlsx file to see how a finished budget might look.
This file is pre-filled with 12 monthly sheets, sample data, and an “Annual Summary” sheet that’s already connected with formulas. Open it up and click around to see how it works!
What You Learned in This Lesson
Fantastic work! This lesson was a big one. You’ve just mastered the three most fundamental operations in all of Excel. Let’s review the key concepts you’ve just learned:
- The difference between a Workbook (the file) and a Worksheet (the tab).
- How to create a new, blank workbook.
- How to open an existing file you’ve already saved.
- The critical difference: “Save” (updates) vs. “Save As” (creates a new copy).
- The life-saving habit of pressing
Ctrl + S. - Why you should almost always save your work as an
.xlsxfile and avoid.csv.
Lesson 2 Complete!
You now know how to create, save, and open your files. You’re no longer just practicing—you’re ready to create real, saveable work.
In the next lesson, we’ll dive back into the grid and learn the most important skills for moving around and selecting data, which is the key to working quickly and efficiently.