Now that you have a workbook and know how to save it, let’s learn how to move around inside a worksheet. Efficient navigation is the key to working faster in Excel.
In this lesson, we’ll use the example file Employee Task Tracker to explore how to move, select, and jump between cells, rows, and columns.
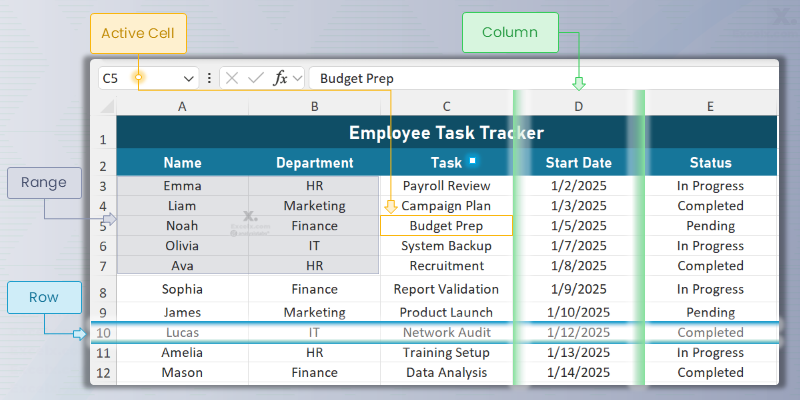
What are Cells, Rows, and Columns?
Excel’s worksheet grid is made of Cells, arranged in Rows and Columns. Understanding how they work together is essential for navigation.
- Cell: Each small box in the grid. It has a unique address called a Cell Reference (e.g.,
C5in our example file refers to “Budget Prep”). - Row: A horizontal line of cells, numbered down the left side (e.g.,
Row 10contains Lucas’s record). - Column: A vertical line of cells, lettered across the top (e.g.,
Column Dcontains all Start Dates).
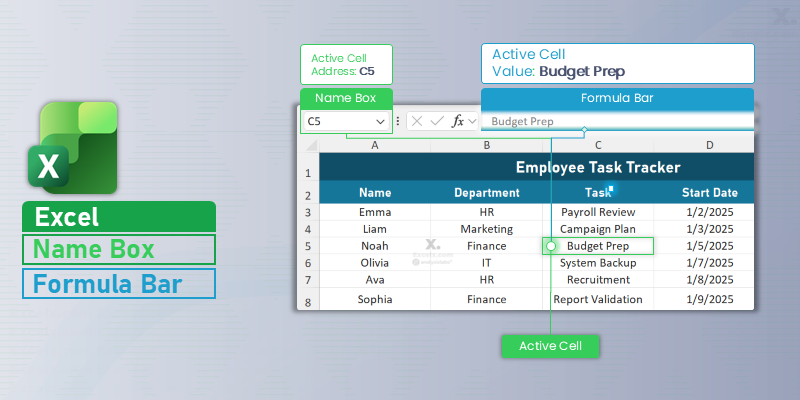
The Name Box & Formula Bar
The Formula Bar (above the column headers) lets you view or edit the contents of the active cell. Just to its left is the Name Box, which shows the address of the selected cell.
- The Name Box displays your current active cell, such as
C5. - Pro Tip: Type any cell address (like
D10) in the Name Box and pressEnterto jump directly to that cell.
How to Select Cells and Ranges
A Range is a group of two or more cells. Its reference is written as the top-left cell, a colon (:), and the bottom-right cell (e.g., A3:B7). In our example file, this range includes employee Names and Departments.
Selecting with Your Mouse
- Single Cell: Click a cell (e.g.,
C5). - Range: Click and drag from
A3toB7. - Non-Adjacent Cells: Hold
Ctrl(Cmdon Mac) and click additional cells or ranges. - Entire Row: Click the row number (e.g., Row 10 for Lucas).
- Entire Column: Click the column letter (e.g., Column D for Start Dates).
- Entire Sheet: Click the small triangle at the top-left corner of the grid.
Selecting with Your Keyboard (Time-Savers)
- Move: Use
Arrow Keysto move one cell at a time. - Select a Range: Hold
Shift+Arrow Keys. - Jump to Edge of Data: Hold
Ctrl+Arrow Keys. - Select to Edge: Hold
Ctrl+Shift+Arrow Keys.
Moving vs. Scrolling
- Moving: Using
Arrow Keys,Enter, orTabchanges your active cell. - Scrolling: Using your mouse wheel or scroll bars moves the view, but keeps the same active cell selected.
Useful Navigation Shortcuts
- Go to Cell A1:
Ctrl + Home - Go to Last Used Cell:
Ctrl + End - Scroll Horizontally:
Shift + Mouse Wheel - Go To Dialog:
F5orCtrl + G
Concepts & Shortcuts Summary
Concepts:
The table below shows the key examples highlighted in your practice sheet — including the active cell, range, row, and column used to demonstrate Excel navigation.
| Concept | Description |
|---|---|
| Active Cell | C5 → Budget Prep |
| Range | A3:B7 → Name + Department |
| Row | Row 10 → Lucas’s Record |
| Column | D → Start Date |
Shortcuts Summary:
Here’s a quick list of the most useful keyboard shortcuts to help you move, select, and jump across your worksheet efficiently.
| Shortcut | Action |
|---|---|
| Ctrl + Arrow Keys | Jump to edge of data |
| Ctrl + Shift + Arrow Keys | Select to edge of data |
| Ctrl + Home | Go to A1 |
| Ctrl + End | Go to last used cell |
| Shift + Mouse Wheel | Scroll horizontally |
| F5 / Ctrl + G | Open Go To dialog |
What You Learned in This Lesson
- You can identify and reference any cell (like
C5), range (A3:B7), row, or column. - You can use the Name Box to jump to any cell instantly.
- You can select data efficiently with mouse or keyboard shortcuts.
- You can navigate easily using
Ctrl + Home,Ctrl + End, andCtrl + G.
Download Practice File
To follow along with this lesson, download the Excel practice workbook used in all examples:
What’s Inside the File?
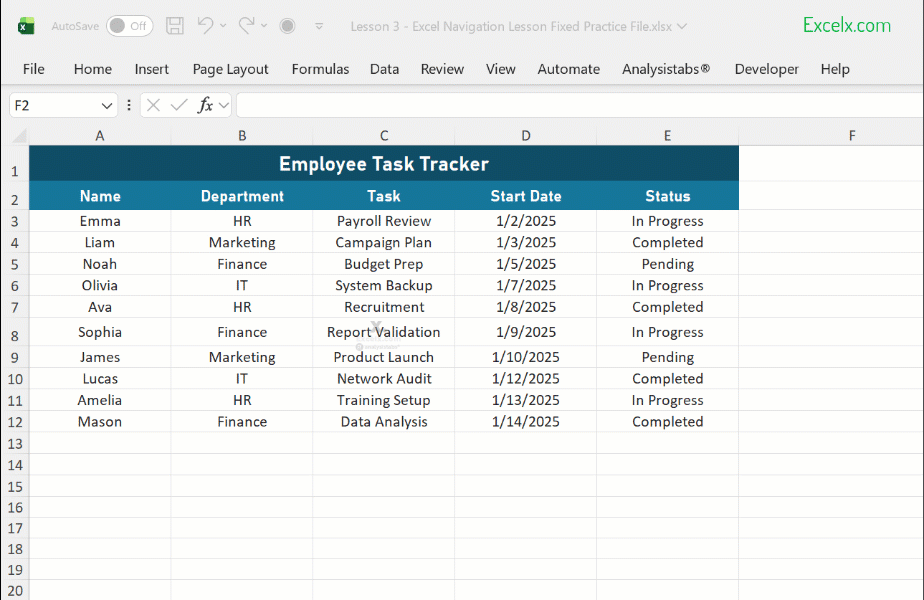
- Employee Task Tracker Table: A small dataset with employee names, departments, tasks, start dates, and status values.
- Pre-highlighted Areas:
- 🟩 C5 (Active Cell): Demonstrates the selected cell concept.
- 🟨 A3:B7 (Range): Shows how to select multiple cells together.
- 🟦 Row 10 (Full Row): Example of selecting an entire row.
- 🟪 Column D (Full Column): Example of selecting an entire column.
- Concepts & Shortcuts Table: A summary of key navigation examples and essential keyboard shortcuts for quick reference.
How to Use This File
- Open the downloaded workbook in Excel.
- Click different cells and watch how the Name Box updates to show the cell address (e.g., “C5”).
- Try dragging across
A3:B7to practice selecting ranges. - Click on the Row 10 header or Column D header to see how entire rows or columns are selected.
- Experiment with keyboard shortcuts like:
Ctrl + Arrow Keys→ Jump to the edge of your data.Ctrl + Shift + Arrow Keys→ Select all data to the edge.Ctrl + Home→ Instantly return to cell A1.Ctrl + End→ Jump to the last used cell.F5orCtrl + G→ Use the Go To dialog to navigate anywhere.
- Scroll horizontally with
Shift + Mouse Wheeland observe that the active cell doesn’t change.
Practicing these actions inside the workbook will help you build muscle memory and navigate any Excel sheet with confidence.